Fondant is a magical ingredient in the world of cake decoration. Known for its smooth, pliable texture, it is the perfect medium for creating intricate designs and stunning finishes. Whether you are a hobbyist or a professional baker, mastering the art of working with fondant is a key skill that can elevate your cake decorating game. In this article, we will explore professional techniques for working with fondant to help you achieve flawless, elegant designs every time.
What is Fondant?
Fondant is a sugar-based icing that has a smooth, elastic texture, which makes it easy to mold, roll, and shape. It is often used to cover cakes, providing a sleek and polished finish. Fondant is also perfect for creating detailed decorations, such as flowers, ribbons, and figurines. There are two main types of fondant: rolled fondant and poured fondant.
- Rolled Fondant: This is the most commonly used type of fondant. It’s firm and can be rolled out into thin layers to cover cakes or to shape decorations.
- Poured Fondant: This is a more liquid form of fondant and is typically used for glazing or pouring over pastries.
In this article, we will focus on rolled fondant, as it is the most versatile and commonly used form for cake decoration.
The Basics of Working with Fondant
Before diving into professional techniques, let’s start with the basics. Below are the essential steps for working with fondant:
1. Prepare Your Cake
The first step in any fondant project is ensuring your cake is properly prepared. Fondant works best on cakes that are smooth, sturdy, and properly crumb-coated. If your cake is crumbly or uneven, it will show through the fondant, so it’s essential to apply a smooth layer of buttercream or ganache before covering it with fondant. This layer will not only create a smooth surface but also help the fondant adhere to the cake.
2. Knead the Fondant
Fondant comes in a pre-made, ready-to-use form, but before you roll it out, it’s important to knead it. Kneading fondant helps to soften it and make it more pliable. Start by dusting your hands with a bit of cornstarch or powdered sugar to prevent the fondant from sticking. Knead the fondant until it becomes smooth and pliable, about 5 to 10 minutes. If the fondant feels too stiff, add a small amount of vegetable shortening to soften it. If it’s too sticky, add a little powdered sugar.
3. Roll Out the Fondant
To cover a cake with fondant, you’ll need to roll it out into a thin sheet. Lightly dust your work surface with cornstarch or powdered sugar to prevent sticking. Roll the fondant into a large circle, ensuring it’s about 1/8 inch thick. You want the fondant to be large enough to cover the entire cake with a little overlap. The key is to roll the fondant evenly to avoid thin or thick spots.
4. Lift and Apply the Fondant
Once your fondant is rolled out, the next step is to transfer it to the cake. To make this process easier, you can roll the fondant onto a rolling pin and then gently unroll it over the cake. Use your hands to smooth the fondant down, starting from the top and working your way down to the sides. Be sure to remove any air bubbles by gently pressing the fondant from the center to the edges.
If you have excess fondant, trim it with a sharp knife or pizza cutter, leaving about 1 inch of excess around the base of the cake. You can then smooth the edges for a crisp, clean finish.
Professional Techniques for Advanced Fondant Work
Now that you’ve mastered the basics, let’s explore some professional techniques to take your fondant decorating to the next level.
1. Perfecting Smooth Edges
One of the hallmarks of professional fondant work is having smooth, crisp edges. To achieve this, after applying the fondant to your cake, use a fondant smoother (a flat, slightly curved tool) to press down the edges and smooth out any imperfections. Start from the top of the cake and work your way down, applying gentle pressure to eliminate any wrinkles or folds.
If you’re covering a tiered cake, make sure the edges of the fondant meet seamlessly where the tiers connect. Use the fondant smoother to press the fondant gently into place.
2. Creating Decorative Flowers
Fondant is perfect for creating beautiful edible flowers. Professional cake decorators often use gum paste or a combination of fondant and gum paste to create flowers, as gum paste hardens more quickly and provides a sturdier base for detailed work.
To create fondant flowers:
- Roll out your fondant thinly using a rolling pin.
- Use a flower cutter to cut out the shape.
- For more intricate flowers, like roses, use a floral wire and a bit of gum paste to create delicate petals.
- To give the flowers dimension, gently press the petals with a ball tool or veining tool.
Remember to dust your flowers with edible color dust to give them depth and realism. Edible glitter can also add an extra touch of sparkle.
3. Adding Texture and Details
Fondant is an excellent medium for adding texture to your cakes. You can create all sorts of textures using different tools:
- Embossing Rollers: These rollers have patterns engraved into them, and you can roll them over your fondant to create intricate designs.
- Fondant Tools: Use tools like the ball tool, veining tool, and quilting tool to create beautiful, detailed textures on flowers, ribbons, and borders.
- Impression Mats: These are perfect for adding texture to larger areas of fondant. Simply press the mat into the fondant to create detailed designs such as lace patterns, fabric textures, or even wood grain.
4. Working with Fondant Cutouts
Cutting out shapes and letters from fondant is a common technique used for decorating cakes, especially for creating messages, names, or themed decorations. To make fondant cutouts:
- Roll out your fondant to the desired thickness.
- Use cookie cutters, shape cutters, or a craft knife to cut out your desired shapes.
- Place the cutout onto your cake and use a small amount of water or edible glue to attach it.
For more intricate designs, you can use silicone molds or impression mats to create 3D shapes like bows, hearts, and stars.
5. Painting and Airbrushing Fondant
Painting with food-grade paints or airbrushing is a professional technique that can make your fondant creations pop. You can use edible food paint or dust to add fine details, shading, and color to your decorations.
For painting:
- Use a fine brush to apply food coloring diluted with a little alcohol or lemon extract to the fondant.
- Start with lighter colors and gradually build up to darker shades for depth.
Airbrushing is another option. Using an airbrush machine, you can spray color directly onto the fondant, creating gradients and subtle color effects. This technique is particularly useful for creating ombre effects or giving a cake a polished, professional look.
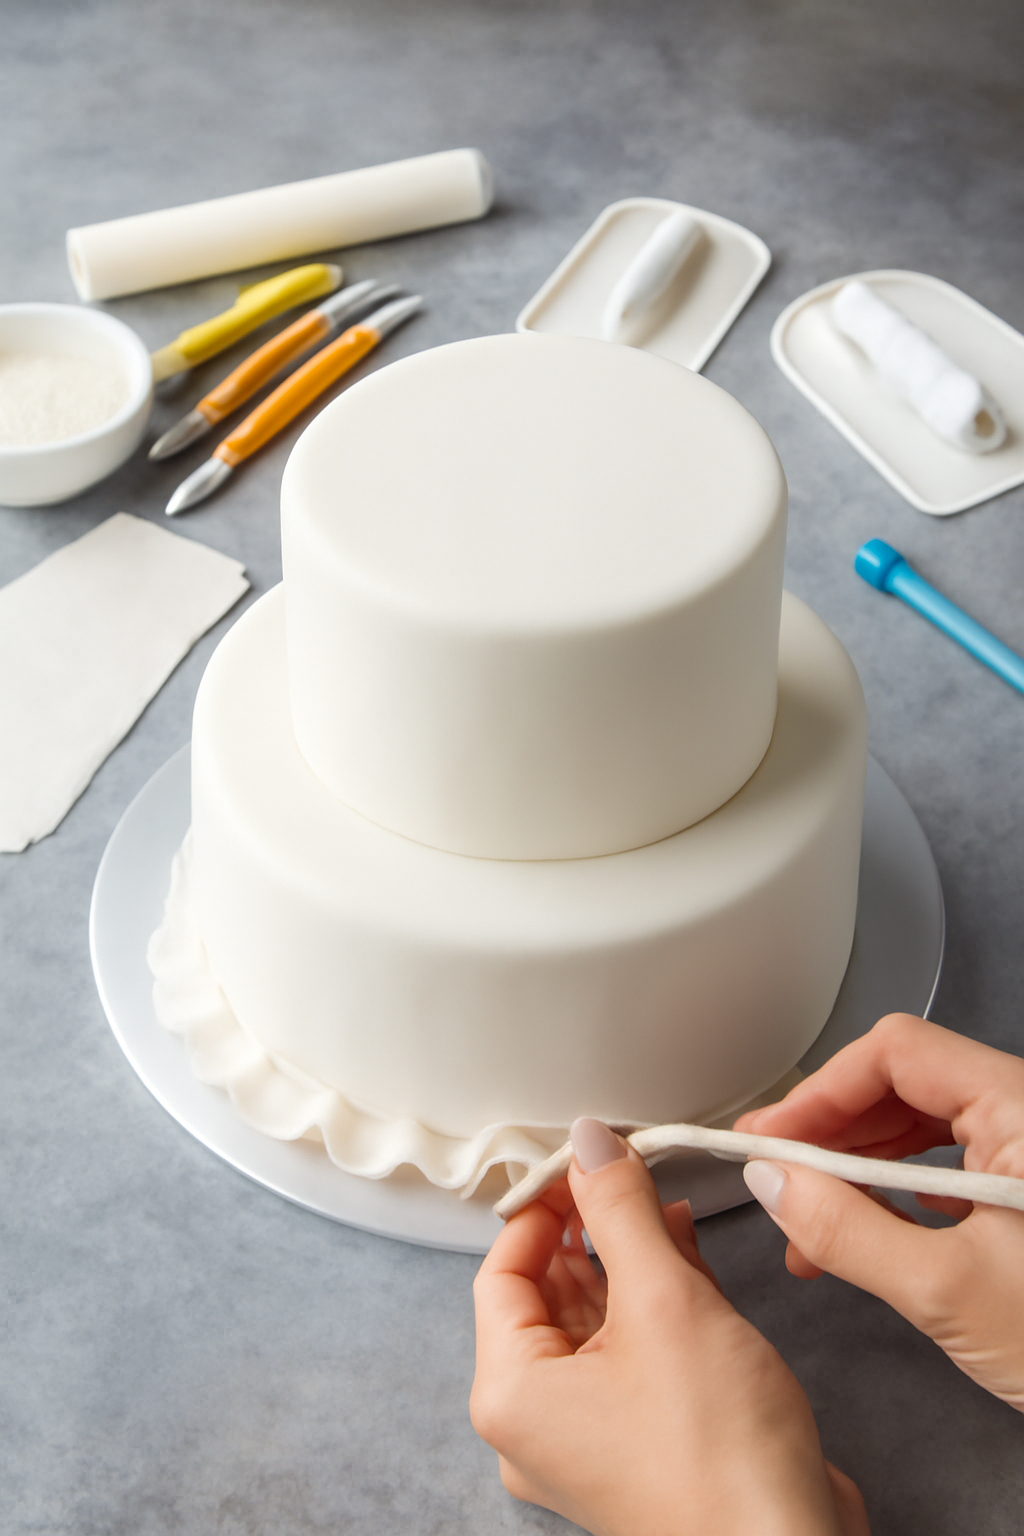
6. Fondant Ribbons and Bows
Creating fondant ribbons and bows is a fantastic way to add elegance to your cake. Roll out your fondant thinly and cut it into strips to form the ribbons. For the bows, you can create loops with the fondant and pinch them together at the center to form the bow shape. Use edible glue or water to secure the ends of the ribbon and bow to your cake.
Troubleshooting Common Fondant Problems
Working with fondant can be tricky at times, but with these professional tips, you can avoid common problems:
- Fondant cracking: This usually happens if the fondant is too dry or the cake is not adequately prepared. Make sure to knead the fondant well and apply a smooth crumb coat to the cake before applying the fondant.
- Fondant sticking: If your fondant is sticking to the work surface, dust it with cornstarch or powdered sugar. Be careful not to use too much, as it can affect the texture of the fondant.
- Bubbles under the fondant: If you see air bubbles under your fondant, gently press them out using a fondant smoother or a pin to pop them.
Final Thoughts
Fondant is an incredibly versatile medium that allows for endless creative possibilities. With the professional techniques outlined in this article, you can elevate your cake decorating skills and produce stunning, polished cakes. Whether you’re covering a cake, creating intricate flowers, or adding texture and color, fondant can help you achieve beautiful results. Practice these techniques, and soon you’ll be able to decorate cakes that look as good as they taste!