Chocolate lollipops are a delightful treat that never goes out of style. Whether you’re looking to create a sweet gift for loved ones, a fun activity for kids, or a unique dessert for a special event, gourmet chocolate lollipops can add a touch of elegance and indulgence to any occasion. What makes them so appealing is not just their delicious flavor but their versatility. You can customize them with different types of chocolate, fillings, and toppings to create a gourmet treat that looks as good as it tastes.
In this article, we’ll walk you through the process of making gourmet chocolate lollipops from scratch. From choosing the right chocolate to adding special flavorings and decorations, you’ll learn everything you need to create beautiful and mouth-watering chocolate lollipops.
Why Make Gourmet Chocolate Lollipops?
Making gourmet chocolate lollipops offers a number of benefits:
- Customizable: You can customize the flavors, shapes, and toppings to suit any occasion or personal preference.
- Elegant and Fun: Chocolate lollipops are perfect for gifts, party favors, wedding treats, or even as a fun activity for kids.
- Affordable: Homemade lollipops are a cost-effective way to create personalized treats, especially compared to buying pre-made gourmet lollipops.
- Impressive Presentation: When packaged beautifully, chocolate lollipops can make a great gift or addition to dessert tables.
Now that you know why gourmet chocolate lollipops are such a great choice, let’s dive into the step-by-step process of making them.
What You’ll Need to Make Gourmet Chocolate Lollipops
Ingredients:
- 200g high-quality chocolate (dark, milk, or white, depending on your preference)
- Lollipop sticks (available at most craft or baking stores)
- Candy molds (lollipop molds or any silicone molds for unique shapes)
- Toppings (optional):
- Crushed nuts (almonds, hazelnuts, pistachios)
- Sprinkles (colored, edible glitter, or sugar crystals)
- Dried fruits (raspberries, strawberries, or cherries)
- Shredded coconut
- Sea salt
- Mini marshmallows
- Flavoring (optional):
- Vanilla extract
- Coffee extract
- Mint extract
Tools:
- Microwave-safe bowl or double boiler
- Spoon or spatula
- Piping bag (optional for decorating)
- Lollipop sticks
- A tray lined with parchment paper for setting the lollipops
Step-by-Step Instructions for Making Gourmet Chocolate Lollipops
Step 1: Choose and Melt the Chocolate
The key to making gourmet chocolate lollipops is selecting the right kind of chocolate. For a smooth, glossy finish and an indulgent flavor, choose high-quality chocolate, whether it’s dark, milk, or white.
How to Melt the Chocolate:
- Microwave Method: Break the chocolate into small pieces and place them in a microwave-safe bowl. Heat in 30-second intervals, stirring in between, until the chocolate is fully melted and smooth.
- Double Boiler Method: Place a heatproof bowl over a pot of simmering water (making sure the bowl doesn’t touch the water). Add the chopped chocolate to the bowl and stir until melted.
For both methods, be sure to stir the chocolate gently and avoid overheating it, as chocolate can easily seize if exposed to too much heat.
Step 2: Prepare the Lollipop Molds
While the chocolate is melting, prepare your candy molds. If you’re using silicone molds, there’s no need to grease them. Simply ensure they are clean and dry.
- For Lollipop Shapes: Choose molds that match the design you want, whether it’s traditional round lollipops, heart-shaped lollipops, or even creative designs like stars, flowers, or animals.
- Insert Lollipop Sticks: If your molds have a hole for a stick, insert the lollipop sticks into the mold’s designated slots. If you’re using a flexible mold, ensure the sticks are positioned properly so they don’t tip over while the chocolate is setting.
Step 3: Pour the Melted Chocolate into the Molds
Once the chocolate is smooth and melted, carefully pour it into the prepared molds. Fill the molds about halfway and gently tap the molds on the counter to remove any air bubbles and settle the chocolate evenly.
If you’re creating layered lollipops, you can let the first layer of chocolate set slightly before adding a second layer of a different flavor or color of chocolate.
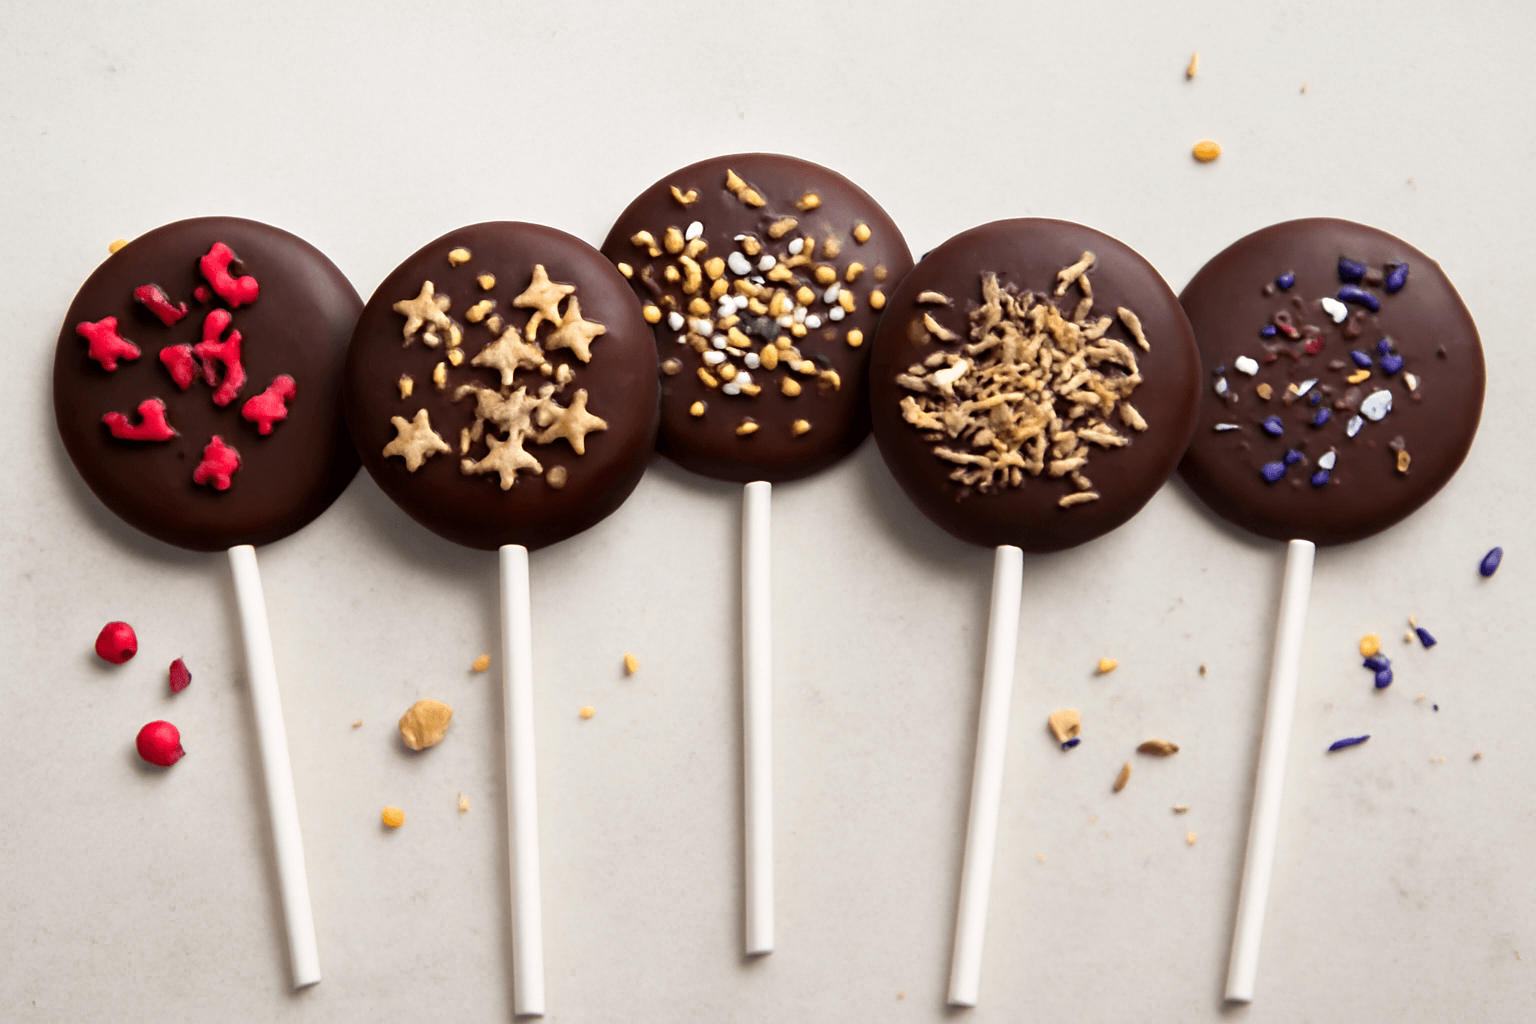
Step 4: Add Toppings (Optional)
Before the chocolate fully sets, you can add your chosen toppings. Some great options include:
- Crushed nuts: These provide a delicious crunch and a slightly salty contrast to the sweetness of the chocolate.
- Sprinkles: A fun way to add color and vibrancy to your chocolate lollipops.
- Dried fruits: Small pieces of dried fruits like raspberries or strawberries add a fruity, tangy element to the chocolate.
- Shredded coconut: For a tropical flair and a chewy texture.
- Edible flowers: These add a sophisticated touch, perfect for weddings or special occasions.
Sprinkle the toppings onto the soft chocolate layer, pressing them lightly into the surface so they stick.
Step 5: Let the Chocolate Set
Once the molds are filled and topped, place the molds in the fridge for 30 minutes to 1 hour, or until the chocolate is completely set and firm. The colder the environment, the quicker the chocolate will set.
If you’re in a warm climate, you may want to let the chocolate set at room temperature in a cool area to prevent condensation from forming on the surface.
Step 6: Remove the Lollipops from the Molds
Once the chocolate has set completely, gently pop the lollipops out of the molds. Silicone molds make this process easy, but you can also use a small knife to gently ease the edges of the lollipops out if necessary.
Step 7: Decorate and Package (Optional)
To make your chocolate lollipops look even more appealing, you can decorate them with an extra drizzle of melted chocolate, edible glitter, or sprinkles.
For packaging, wrap the lollipops in clear plastic bags and tie them with colorful ribbons or use a decorative lollipop holder. They also make great gift options when presented in a gift box.
Tips for Making Perfect Gourmet Chocolate Lollipops
- Choose High-Quality Chocolate: The quality of the chocolate directly impacts the flavor and texture of your lollipops. Use premium chocolate for the best results.
- Work Quickly: Chocolate sets fast, especially when it’s melted. Be sure to work quickly when pouring the chocolate into the molds and adding toppings.
- Store Properly: To keep your chocolate lollipops fresh, store them in an airtight container in a cool, dry place. Avoid refrigerating them, as it can cause condensation that affects the chocolate’s texture.
- Use Piping Bags for Precision: If you want to add designs or create layered chocolate lollipops, use a piping bag for more control when decorating.
Creative Variations to Try
- Marbled Chocolate Lollipops: Create a marbled effect by drizzling white chocolate over dark chocolate and swirling them together with a toothpick.
- Flavored Chocolate Lollipops: Add flavor extracts (like orange, mint, or raspberry) to your chocolate for a unique twist.
- Filled Lollipops: Create a hollow lollipop and fill it with ganache, fruit filling, or even a small truffle for a surprise inside.
Conclusion
Gourmet chocolate lollipops are a fun, easy, and impressive treat to make for any occasion. With just a few simple ingredients and creative touches, you can craft beautiful lollipops that will delight friends, family, or customers. Whether you’re making them for a special event, as a gift, or just for fun, these sweet treats are sure to be a hit. Get creative with toppings, flavors, and packaging to turn your chocolate lollipops into something truly unique!