Layer cakes are a stunning and delicious way to celebrate any occasion, from birthdays to weddings, holidays to casual get-togethers. However, assembling a multi-layer cake can be tricky. If not done correctly, you may end up with a cake that collapses, tilts, or simply doesn’t look as beautiful as you envisioned. In this article, we will share essential tips and techniques to help you assemble layer cakes without deforming them. Whether you are a beginner baker or an experienced one looking to improve your skills, this guide will provide you with all the tools you need to create perfect, towering cakes every time.
Why Layer Cakes Are a Popular Choice
Layer cakes are a go-to dessert for many reasons. Here are just a few:
- Visual Appeal: Layer cakes are visually impressive, with their tall, multi-layered design.
- Variety: You can get creative with different fillings, frostings, and flavor combinations.
- Perfect for Occasions: Layer cakes are often associated with celebrations, making them the ideal centerpiece for any special event.
- Customization: You can easily adapt them to suit various themes, tastes, and dietary preferences.
However, achieving that flawless, picture-perfect layer cake can be a challenge. Let’s look at the best practices for assembling these cakes without them deforming.
Step 1: Bake Even Layers
The first and most crucial step in building a perfect layer cake is ensuring that your cake layers are even and uniform. If your layers are uneven or lopsided, it will be nearly impossible to stack them properly.
Tips for Baking Even Layers:
- Use Cake Strips: Cake strips are silicone bands that wrap around your cake pans and help distribute heat evenly during baking. This prevents the cakes from doming, leading to a more even surface.
- Level the Cake Layers: After the cake has cooled, use a serrated knife or cake leveler to remove any dome from the top. This step is vital to create an even, stable base for stacking.
- Measure the Batter: Ensure that each pan gets the same amount of batter. You can use a kitchen scale to measure the batter or simply divide it evenly between the pans by volume.
By starting with even layers, you’ll have a much easier time assembling your cake without worrying about it becoming unbalanced or top-heavy.
Step 2: Let the Cake Layers Cool Completely
Before assembling your layer cake, make sure the cake layers are completely cooled. Warm cakes can lead to sagging and melting frosting, resulting in a cake that is not only difficult to assemble but also prone to deforming.
Why Cooling is Important:
- Prevents Melting Frosting: If the cake layers are still warm, the frosting will melt and become runny. This can make it challenging to frost and create a smooth finish.
- Stabilizes the Cake: Cooling allows the structure of the cake to firm up, which will help the cake hold its shape as you stack and frost it.
Allow the cake layers to cool in the pan for about 10-15 minutes, then transfer them to a wire rack to cool completely.
Step 3: Use a Strong Base for Support
One of the main reasons cakes collapse or deform is the lack of proper support. A strong base ensures that the weight of the top layers doesn’t crush the lower ones, keeping your cake intact.
Tips for Creating a Strong Base:
- Cake Boards: Use cake boards for each layer of your cake. These boards provide a sturdy foundation and prevent the cake from shifting during assembly.
- Dowel Rods or Straws: For taller cakes with multiple layers, use dowel rods or thick plastic straws to provide internal support. Insert these supports into the center of the cake after stacking the layers. These will help distribute the weight of the upper layers and prevent them from sinking into the lower ones.
- Chill the Cake Layers: If you’re assembling a large, multi-tiered cake, chilling the layers in the refrigerator before stacking can help them set and firm up, preventing any shifting or deformation as you assemble.
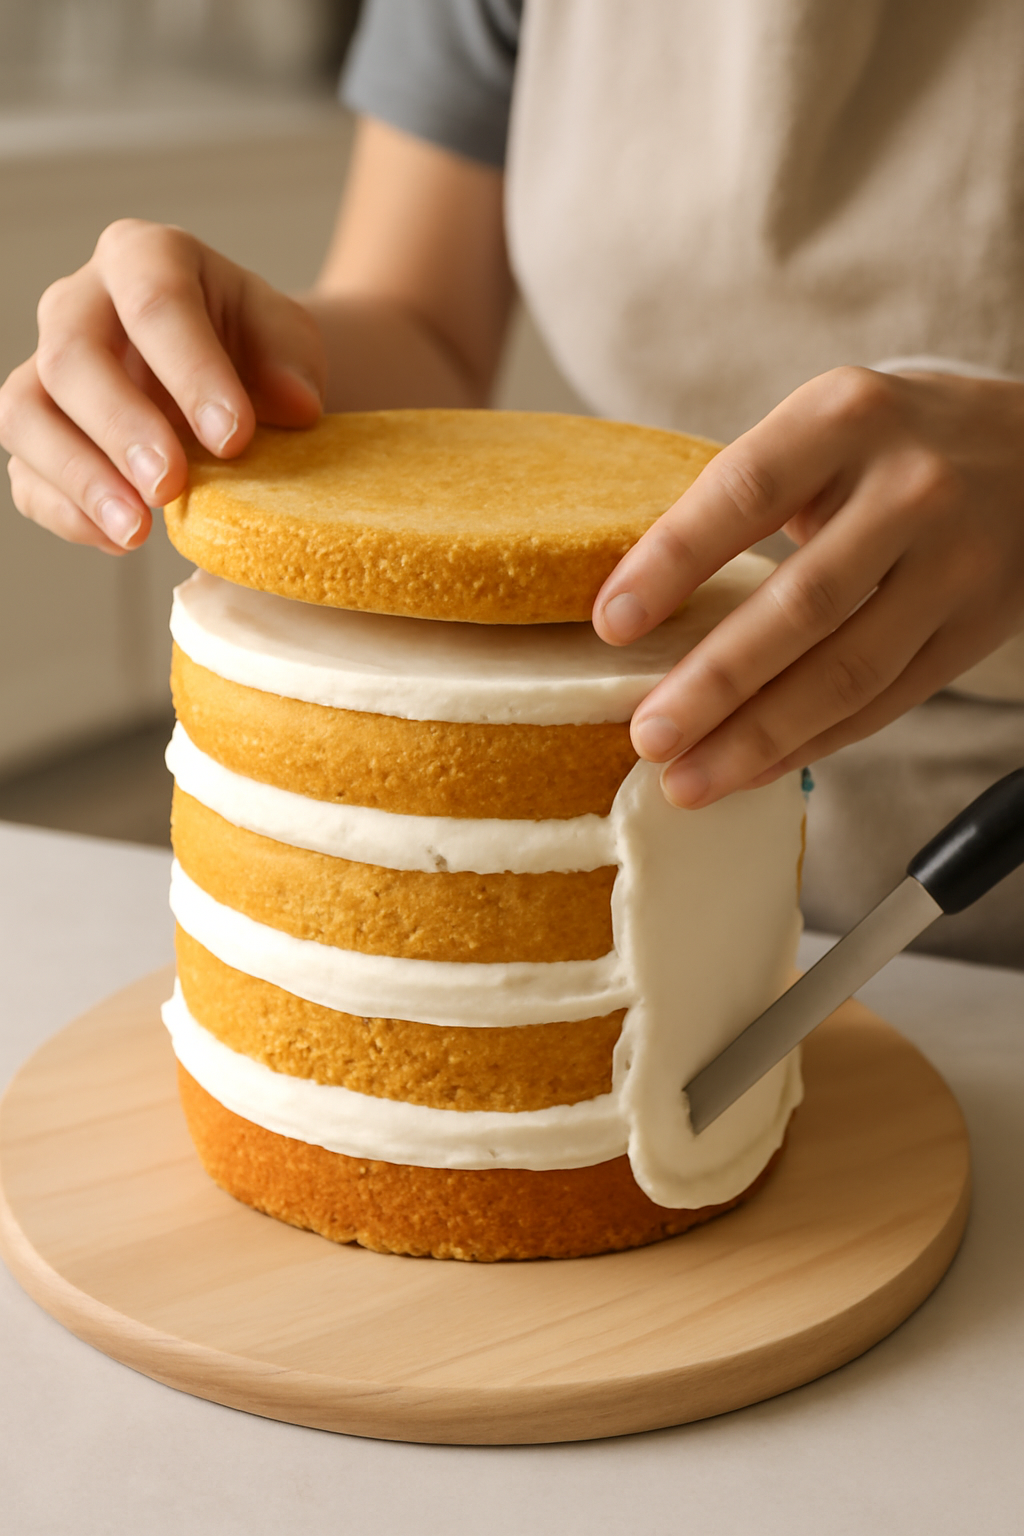
Step 4: Apply a Crumb Coat
A crumb coat is a thin layer of frosting applied to the entire cake. This serves as a sealant to trap any crumbs in place, making it easier to apply a smooth, flawless final coat of frosting.
How to Apply a Crumb Coat:
- Once the cake layers are stacked, spread a thin layer of frosting over the entire cake. Don’t worry about perfection—this layer is just to catch any loose crumbs.
- Use an offset spatula to smooth out the frosting and ensure it covers all the exposed parts of the cake.
- Chill the cake for about 15-20 minutes to set the crumb coat before applying the final layer of frosting.
A good crumb coat creates a smooth surface for the final layer of frosting, reducing the chances of crumbs making your cake look messy or uneven.
Step 5: Stack the Layers Carefully
Now that you have all the preparation steps done, it’s time to stack your cake layers. This step is all about patience and precision.
How to Stack the Layers:
- Start with the First Layer: Place your first cake layer on a cake board or serving platter. Make sure it is centered.
- Add Filling: Spread an even layer of frosting or filling over the first layer. Don’t overfill it, as excess filling can cause the cake to collapse.
- Add the Next Layer: Place the second layer of cake on top of the filling. Gently press down to ensure it’s evenly centered. Repeat the process for each subsequent layer.
- Ensure Straight Alignment: As you stack, check that the layers are aligned and straight. If they start to lean to one side, gently adjust them before the frosting sets.
Step 6: Frosting the Cake
Frosting is where the beauty of your cake really comes to life. Smooth, even frosting will ensure that your cake looks professional and polished.
Tips for Perfect Frosting:
- Use an Offset Spatula: This tool will help you apply frosting more evenly and get into the edges and corners with ease.
- Smooth Out the Frosting: After applying a layer of frosting, use the offset spatula to smooth it out. For a flawless finish, try using a bench scraper to smooth the sides of the cake.
- Chill Between Coats: If you want a perfectly smooth finish, chill the cake between coats of frosting to set each layer. This will prevent the frosting from mixing into the cake and help it stay neat.
Step 7: Adding Decorations
Once your cake is frosted, it’s time to add the finishing touches. Decorations can range from simple sprinkles and fruits to more elaborate piping designs.
Popular Cake Decorations:
- Piping: Use piping bags to create beautiful rosettes, borders, or decorative patterns on the cake.
- Fresh Fruit: Add fresh fruit like berries, citrus slices, or even edible flowers for a fresh and colorful touch.
- Chocolate: Chocolate shavings, curls, or ganache can add a luxurious and decadent look.
The sky’s the limit when it comes to decorating your cake, so have fun with it and let your creativity shine!
Final Tips for a Flawless Layer Cake
- Take Your Time: Assembling and decorating a layer cake takes time and patience. Don’t rush through it. A little extra effort will make a big difference in the end.
- Keep It Cool: If you’re working with buttercream frosting or fondant, keep the cake in a cool environment to prevent it from melting or sagging.
- Practice Makes Perfect: The more you practice assembling and frosting layer cakes, the better you will get at it. Don’t be afraid to experiment with different techniques and flavors.
Conclusion: Mastering the Art of Layer Cakes
Assembling a layer cake without deforming it requires attention to detail and a steady hand, but with these tips and techniques, you’ll be able to create beautiful cakes every time. Start with even layers, cool cakes, a strong base, and a well-applied crumb coat. Stack the layers carefully, frost them perfectly, and decorate with your signature touch. In no time, you’ll be mastering the art of layer cake assembly and impressing your friends and family with your stunning creations.