Ganache is a versatile and delicious chocolate mixture that can elevate your cakes, cupcakes, pastries, and other desserts. Made from just two main ingredients—chocolate and heavy cream—ganache is known for its rich, smooth texture and glossy finish. Whether you’re looking for a filling for your cakes or a decadent topping to complete your desserts, mastering ganache is essential for any baker. In this article, we’ll guide you through how to make the perfect ganache for filling or topping, including different variations and tips to get the ideal consistency every time.
What is Ganache?
Ganache is a mixture of chocolate and cream that can be used in a variety of ways, from fillings and glazes to frostings and truffles. The ratio of chocolate to cream determines its consistency, so you can adjust it based on your needs.
- Thicker Ganache: For a thicker ganache that works as a filling or frosting, use a higher ratio of chocolate to cream (typically 2:1).
- Thinner Ganache: For a pourable ganache that works as a glaze or topping, use more cream and less chocolate (typically 1:1).
The beauty of ganache is its versatility. By varying the chocolate and cream ratios or adding flavorings like vanilla or liqueur, you can customize it to suit your desserts perfectly.
Ingredients for the Perfect Ganache
To make the perfect ganache, you only need two simple ingredients:
- Good quality chocolate (dark, milk, or white, depending on your preference)
- Heavy cream (with a fat content of at least 30%)
Optional additions include:
- Butter (for added richness and shine)
- Flavorings (such as vanilla extract, espresso, or liqueurs like rum or brandy)
- Salt (a pinch of salt helps balance the sweetness of the ganache)
Types of Chocolate for Ganache
The type of chocolate you choose will influence the flavor and texture of the ganache:
- Dark Chocolate: Dark chocolate ganache is rich and intense, with a deep, bittersweet flavor. It’s perfect for those who love the bold taste of chocolate.
- Milk Chocolate: Milk chocolate ganache is sweeter and creamier, with a milder flavor. It works well for cakes and cupcakes where a sweeter, lighter chocolate flavor is desired.
- White Chocolate: White chocolate ganache is smooth and sweet with a more subtle flavor. It pairs well with fruity or citrus desserts.
For the best results, always choose high-quality chocolate, as the chocolate flavor is the star of the ganache.
Step-by-Step Guide to Making Ganache
1. Prepare Your Ingredients
Start by gathering your ingredients:
- 200g of chocolate (dark, milk, or white, depending on your choice)
- 200ml of heavy cream
- Optional: 1 tablespoon of butter (for extra richness and shine)
- Optional: A pinch of salt or any flavoring of your choice (e.g., vanilla extract or liqueur)
Chop your chocolate into small, uniform pieces to ensure it melts evenly and smoothly. If you’re using milk or white chocolate, be cautious, as they can burn more easily than dark chocolate.
2. Heat the Cream
In a saucepan, heat the heavy cream over medium heat. Watch carefully and stir occasionally to prevent it from boiling over. Once it starts to steam and small bubbles form around the edges, it’s ready. Do not let it come to a full boil, as this can cause the cream to separate.
3. Pour the Cream Over the Chocolate
Place your chopped chocolate in a heatproof bowl. Pour the hot cream over the chocolate and let it sit for about 3-5 minutes. This will allow the cream to melt the chocolate without the need for stirring right away.
4. Stir Until Smooth
After the chocolate has softened, gently stir the mixture using a whisk or spatula until it becomes smooth and shiny. If you’re using butter, add it at this stage and stir until fully incorporated. The butter adds a velvety richness and glossy finish to your ganache.
If you notice any lumps or the ganache isn’t coming together, you can place the bowl over a pot of simmering water (double boiler method) to gently heat it and continue stirring until it smooths out.
5. Adjust Consistency
Once your ganache is smooth, assess its consistency. If you’re using it as a topping or glaze, you’ll want a thinner ganache. Let it cool for about 5-10 minutes at room temperature or refrigerate for a few minutes to thicken.
If you need a thicker ganache for filling or frosting, allow it to cool further, or place it in the fridge to speed up the process. Stir it every few minutes until it reaches the desired consistency.
6. Use or Store the Ganache
Once you’ve achieved the right consistency, your ganache is ready to use. Pour it over your cake for a glossy glaze, or use a spatula to spread it as a thick frosting or filling. If you’re not using it immediately, you can store ganache in an airtight container in the fridge for up to a week. To reuse, gently reheat it in the microwave or over a double boiler until it’s smooth again.
Tips for the Perfect Ganache
1. Use Room Temperature Cream
For the smoothest ganache, it’s important that the cream is heated, not cold. Cold cream can cause the chocolate to seize up and become lumpy.
2. Don’t Overheat the Cream
Heating the cream too long can cause it to curdle, which will affect the texture of the ganache. Be sure to remove the cream from the heat as soon as it starts to steam, and before it reaches a full boil.
3. Add Flavor Variations
If you want to customize your ganache, you can infuse the cream with flavors before pouring it over the chocolate. To do this, simply heat the cream with a flavoring of your choice—like vanilla beans, cinnamon, or a splash of espresso—then strain the flavoring out before combining it with the chocolate.
4. Chill to Use as a Filling or Frosting
If you’re using ganache as a filling or frosting, allow it to cool to a thicker consistency. Refrigerating the ganache will help it set and give it the perfect consistency for spreading or piping.
5. Fixing a Grainy Ganache
If your ganache becomes grainy or separated, it might have been overheated or the chocolate was of poor quality. To fix it, place the bowl over a double boiler and add a little more cream, stirring until it comes back together.
How to Use Ganache for Cake Decoration
Now that you’ve made the perfect ganache, let’s explore how you can use it to decorate cakes.
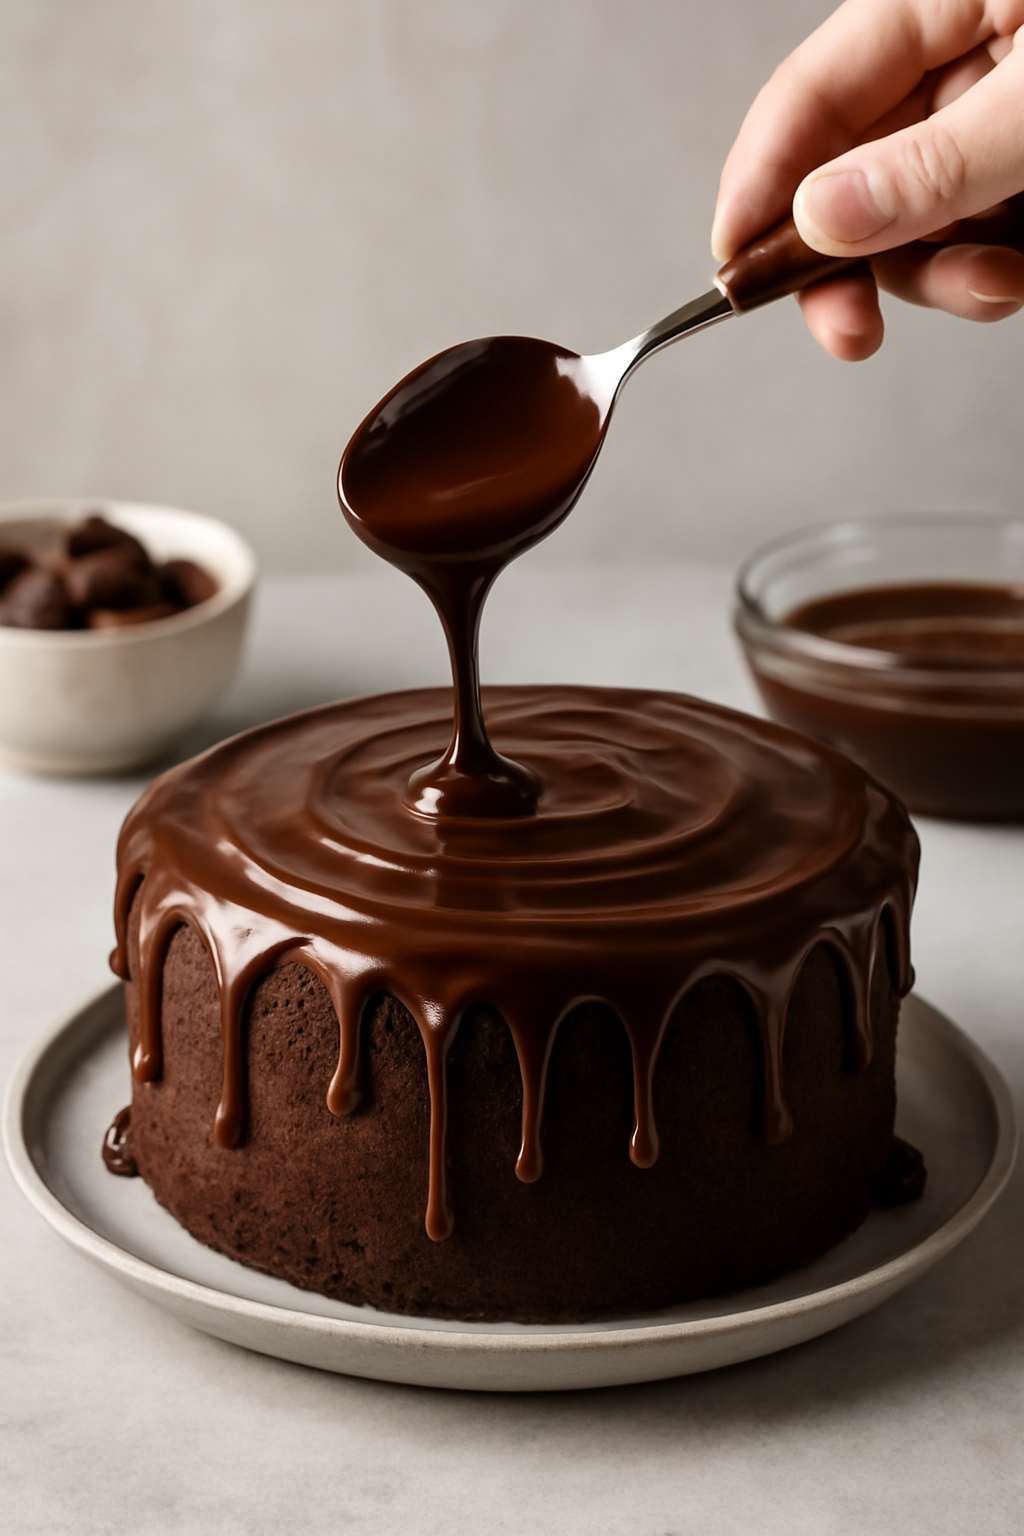
1. As a Topping or Glaze
Pour ganache over your cake to create a glossy finish. Let it drip down the sides for a beautiful drip cake effect, or spread it evenly for a smooth, professional-looking finish.
Instructions:
- Allow the ganache to cool slightly before pouring it over the cake, ensuring it doesn’t run too much.
- Let the ganache set at room temperature or refrigerate to help it firm up.
2. As a Filling
Ganache works wonderfully as a filling between cake layers, especially for rich, decadent cakes.
Instructions:
- Spread a layer of ganache between the cake layers and refrigerate to help it firm up before finishing the rest of the decoration.
3. As a Frosting
For a rich, glossy finish, ganache can also be used as a frosting for cakes and cupcakes. It provides a smooth, shiny layer and can be piped into designs as well.
Instructions:
- Let the ganache cool to the desired consistency, and then spread it onto the cake using a spatula or pipe it using a piping bag.
Conclusion
Making the perfect ganache is easy and requires only a few ingredients. With a little practice, you’ll be able to create ganache that works beautifully as both a filling and topping for cakes, cupcakes, and other desserts. By adjusting the chocolate-to-cream ratio and experimenting with different flavors, you can customize ganache to suit any dessert style. Whether you’re making a glossy drip cake, a rich filling, or a smooth frosting, ganache will elevate your baking to the next level. So go ahead, try making this classic chocolate treat, and impress your guests with your delicious, perfectly decorated cakes!