Chocolate fudge is one of those irresistible treats that combines rich flavor with a soft, melt-in-your-mouth texture. Whether you’re preparing it for a festive celebration, a gift, or a personal indulgence, making chocolate fudge at home is both rewarding and surprisingly easy. This article walks you through a foolproof recipe along with tips, variations, ideas for serving and storing this delightful dessert, and even some fun facts and troubleshooting guidance to take your fudge-making to the next level.
Why Make Chocolate Fudge at Home?
Homemade chocolate fudge offers several advantages over store-bought options:
- Superior taste and texture using quality ingredients.
- Customizable flavors and mix-ins.
- No preservatives or artificial additives.
- Budget-friendly and ideal for gift-giving.
- Fun and family-friendly cooking activity.
Essential Ingredients
Here’s what you’ll need for a classic batch of chocolate fudge:
- 3 cups semisweet chocolate chips (or chopped chocolate)
- 1 (14-ounce) can sweetened condensed milk
- ¼ cup unsalted butter
- 1 teaspoon vanilla extract
- Pinch of salt
Optional mix-ins and toppings:
- Chopped nuts (walnuts, pecans, almonds)
- Crushed peppermint
- Mini marshmallows
- Swirled peanut butter or caramel
- Sprinkles or sea salt
- Crushed cookies or pretzels
Step-by-Step Instructions
Step 1: Prepare Your Pan
Line an 8×8-inch square baking dish with parchment paper or foil, leaving some overhang for easy removal. Lightly grease the parchment paper to ensure easy release.
Step 2: Melt the Ingredients
In a medium saucepan over low heat, combine the chocolate chips, sweetened condensed milk, and butter. Stir constantly until the mixture is completely melted, smooth, and glossy. Be patient—melting too fast can scorch the chocolate.
Step 3: Add Flavor
Remove from heat and stir in vanilla extract and a pinch of salt. Mix until well combined and the aroma becomes rich and inviting.
Step 4: Incorporate Add-ins (Optional)
Fold in any extras such as chopped nuts, mini marshmallows, or cookie pieces. Use a spatula to distribute evenly throughout the fudge mixture.
Step 5: Spread and Set
Pour the mixture into the prepared pan and smooth the top with a spatula. Tap the pan gently on the counter to eliminate air bubbles. Let it sit at room temperature for 10–15 minutes before transferring to the fridge.
Step 6: Refrigerate
Refrigerate for at least 2–3 hours or until firm. Overnight chilling can enhance the texture and deepen the flavor.
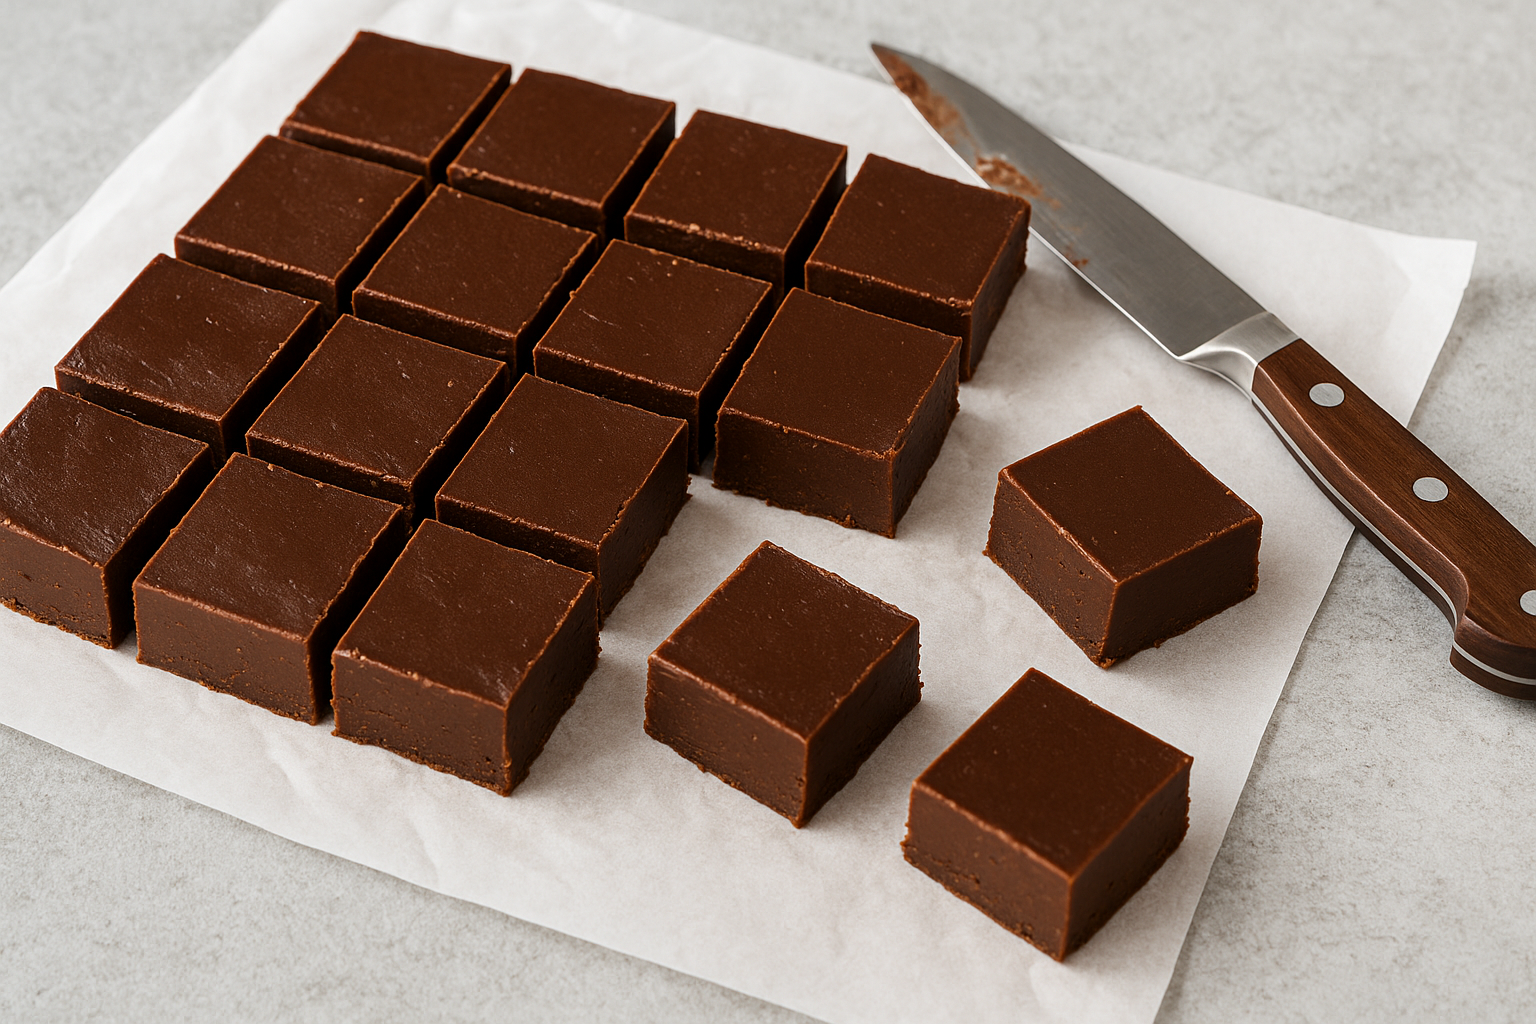
Step 7: Slice and Serve
Lift the fudge from the pan using the overhanging parchment. Use a warm, sharp knife to slice clean squares. Wipe the knife between cuts for perfect edges.
Flavor Variations to Try
1. Peanut Butter Fudge
Add ½ cup creamy peanut butter with the chocolate for a nutty twist.
2. Mint Chocolate Fudge
Use mint extract instead of vanilla and top with crushed peppermint.
3. White Chocolate Raspberry
Swap chocolate chips for white chocolate and swirl in raspberry jam.
4. Rocky Road
Add chopped walnuts, marshmallows, and chocolate chunks.
5. Mocha Fudge
Stir in 1 tablespoon of instant coffee granules for a caffeine kick.
6. Nutella Fudge
Substitute 1 cup of the chocolate chips with Nutella for extra creaminess.
7. Cookies and Cream
Fold in chopped chocolate sandwich cookies.
8. Salted Caramel Fudge
Drizzle caramel sauce over the top and sprinkle with flaky sea salt.
Presentation and Packaging Ideas
Chocolate fudge can be both a delicious dessert and a beautiful gift:
- Arrange in mini cupcake liners for easy serving.
- Package in decorative tins or boxes lined with wax paper.
- Add a handwritten tag or label with the flavor and date.
- Use seasonal decorations like ribbons, ornaments, or themed stickers.
- Wrap individual pieces in wax paper for lunchbox treats.
Tips for Success
- Use high-quality chocolate for the best flavor and texture.
- Don’t overheat the chocolate—melt slowly to prevent burning or graininess.
- Let the fudge cool completely before cutting for clean edges.
- For smoother texture, sift any dry add-ins before folding them in.
- If fudge is too soft, chill longer or reduce butter slightly next time.
- Keep utensils dry—water can cause the chocolate to seize.
Common Mistakes and How to Fix Them
- Grainy Fudge: Usually caused by overheating. Use low heat and stir gently.
- Fudge Too Soft: May need more chocolate or longer chilling time.
- Oily Surface: Occurs when butter separates—reduce butter or mix more thoroughly.
- Won’t Set: Check ingredient ratios. Too much condensed milk can make fudge runny.
Storing and Freezing
- Room temperature: Store in an airtight container for up to 1 week.
- Refrigerator: Keeps well for 2–3 weeks.
- Freezer: Wrap pieces individually in plastic and freeze in a bag or container for up to 3 months. Thaw overnight in the fridge before serving.
Fun Ways to Enjoy Fudge
- Crumble over ice cream for a rich topping.
- Serve with coffee or espresso as a mini dessert.
- Dip in melted white chocolate for a double layer of indulgence.
- Add fudge chunks to brownie batter or muffin mix.
- Use as filling in cookie sandwiches or between cake layers.
- Mix into milkshakes or hot chocolate for creamy texture.
Fun Facts About Fudge
- Fudge originated in the United States in the late 19th century.
- The first recorded fudge recipe dates back to the 1880s.
- Fudge shops are popular tourist attractions in places like Mackinac Island, Michigan.
- National Fudge Day is celebrated annually on June 16th.
A Sweet Classic That Never Fails
Chocolate fudge is one of those desserts that never goes out of style. It’s comforting, delicious, and surprisingly easy to make with just a few ingredients. Whether you’re keeping it simple or experimenting with creative variations, this treat is sure to bring smiles wherever it goes.
So gather your ingredients, put on your favorite playlist, and get ready to enjoy the rewarding process of making homemade fudge. Your taste buds—and anyone you share it with—will thank you!